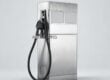
The reliability of your fluid dispensing infrastructure directly impacts your site’s operational efficiency, safety compliance, and bottom line. While bulk storage tanks and heavy-duty transfer pumps often receive the majority of maintenance attention, the dispensing nozzle—the critical final touchpoint between your storage systems and your fleet or machinery—is frequently overlooked until a failure occurs. An improperly maintained nozzle leads to costly fuel leaks, frustrating nuisance auto shut-offs, reduced flow rates, and potential safety hazards in hazardous environments.
Implementing a strict preventive maintenance schedule for Fuel Nozzles is not just about keeping the equipment clean; it is about preserving the engineered tolerances of the shut-off mechanisms, protecting the integrity of the pressure-sensing diaphragms, and ensuring maximum throughput. For plant managers, industrial engineers, and procurement heads, adopting a proactive maintenance stance shifts the operational model from reactive firefighting to predictable, uninterrupted asset availability.
Quick ROI Snapshot
- Typical payback period for PM program: Immediate (by preventing a single environmental spill) to 3 months (through extended hardware lifespan).
- Key financial driver: Eliminating unrecorded fuel loss and avoiding the premature replacement of entire dispensing assemblies.
- Operational uptime gain: Reduces nuisance shut-offs and flow restrictions, improving fleet fueling turnaround times by up to 15%.
1. Product Overview and Critical Wear Components
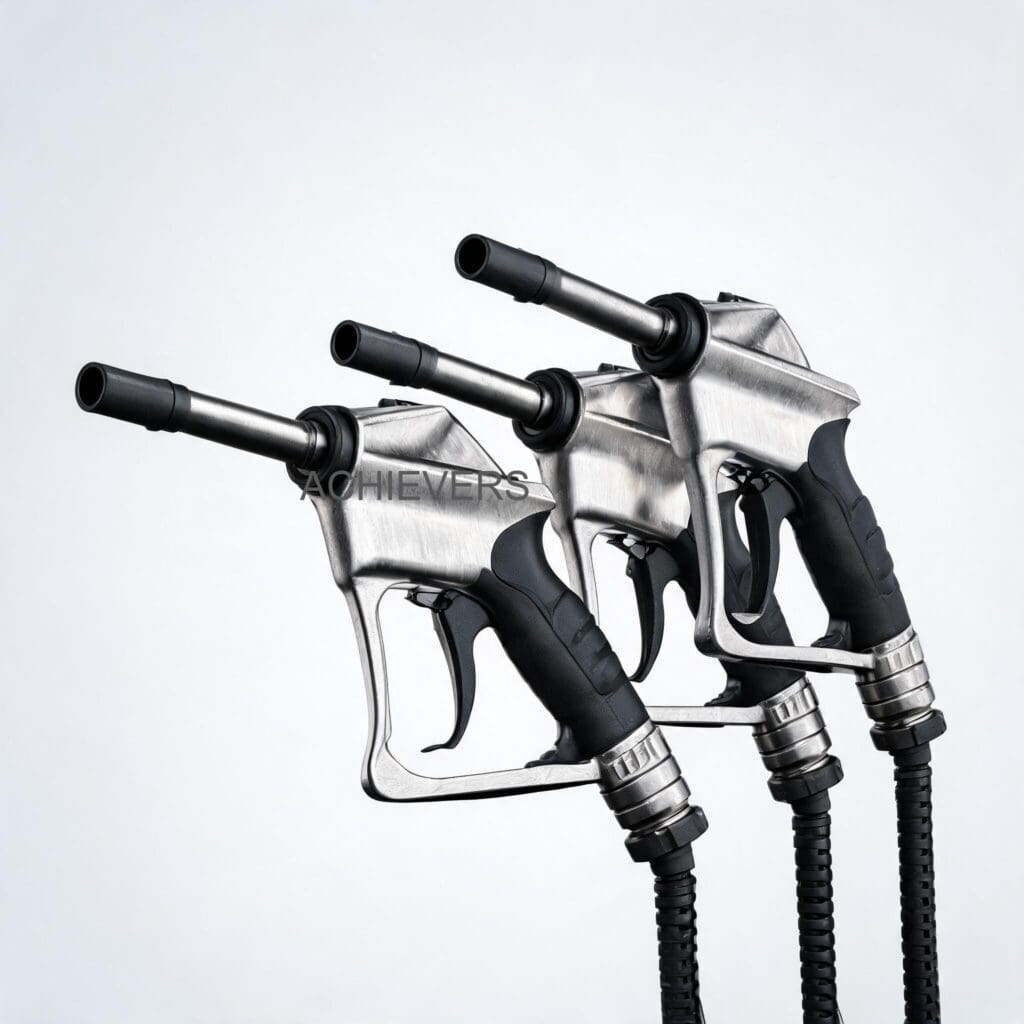
To properly maintain Fuel Nozzles, maintenance personnel must first understand the internal engineering and materials utilized in their construction. High-quality industrial nozzles, such as the OPW 11b arrangement style, are designed for high-volume retail, commercial, and industrial applications, integrating seamlessly with prepay, self-service, and card-lock systems.
These modern nozzles feature a unique "no pressure – no flow" safety device. The nozzle cannot be opened until the centralized pumping system is pressurized, and it closes automatically when pressure is removed. This prevents gravity-fed leaks and unauthorized dispensing. Additionally, precision flow control technology (often referred to as Accu-stop) allows operators to manage flow rates down to the exact required volume without surging or splashing.
Understanding the critical components is key to targeted maintenance:
- Stainless Steel Spout Tip: Engineered to last four times longer than standard aluminum spouts, resisting wear from constant insertion into vehicle filler necks.
- Duratuff Lever Guard: A robust, composite guard that protects the lever mechanism from impact drops without scratching client vehicles.
- Hold-Open Clip Spring: Designed for high-cycle endurance to lock in flow rates, releasing instantly when the automatic shut-off triggers.
- Vacuum Sensing Port: A tiny opening near the spout tip that utilizes the Venturi effect. When fuel covers this port, it creates a vacuum differential that trips the shut-off diaphragm.
Below is the foundational technical specification table for standard heavy-duty Fuel Nozzles, which dictates the operational parameters your maintenance team must respect.
| Specification Parameter | Technical Rating | Operational Implication |
| — | — | — |
| Inlet Thread Size | BSP 3/4" | Requires standard thread sealant (PTFE tape or liquid thread locker approved for hydrocarbons) during installation to prevent weeping. |
| Spout Diameter | 13/16" | Standard size for diesel, unleaded fuel, and up to 10% ethanol blends; ensure vehicle filler necks are compatible. |
| Flow Rate Capacity | 0 – 60 L/min | Maintenance of strainers is critical; clogged filters will drop flow rates significantly below the 60 L/min threshold. |
| Max Operating Pressure | 0.18 MPa (1.8 Bar) | System relief valves must be calibrated not to exceed this pressure to protect the nozzle's internal diaphragm. |
| Cycle Verification | > 1 Million Cycles | Ensures long-term durability, provided the lever guard and hold-open clip are kept free of physical debris. |
| Net Weight | 1.14 kg per unit | Lightweight design reduces operator fatigue; if weight feels excessive, the nozzle body may be flooded/failing internally. |
2. Preventive Maintenance Schedule
A robust maintenance schedule prevents minor wear from compounding into catastrophic failure. The following checklist is designed for high-throughput industrial and fleet fueling applications. Frequency should be adjusted based on usage volume and the harshness of the operating environment (e.g., highly dusty mining sites may require weekly strainer checks rather than monthly).
| Task Description | Frequency | Responsible Personnel | Est. Time | Maintenance Notes / Acceptance Criteria |
| — | — | — | — | — |
| Visual External Inspection | Daily | Pump Operator / Driver | 2 Mins | Check for severe cracks in the Duratuff lever guard, bent spouts, or obvious fuel weeping. |
| Sensing Port Clearance | Weekly | Maintenance Tech | 5 Mins | Ensure the vacuum sensing hole at the tip of the stainless steel spout is free of mud, ice, or debris. |
| Hold-Open Clip Test | Weekly | Maintenance Tech | 3 Mins | Engage the clip and tap the spout lightly; the clip should release smoothly without binding. |
| Hose Connection Leak Check | Weekly | Maintenance Tech | 5 Mins | Inspect the BSP 3/4" inlet thread and swivel joint (if equipped) under pressure for any signs of sweating or dripping. |
| Flow Rate Verification | Monthly | Site Supervisor | 10 Mins | Dispense into a calibrated proving can. If flow is significantly below 60 L/min, schedule strainer cleaning. |
| Inlet Strainer Cleaning | Monthly | Maintenance Fitter | 15 Mins | Remove, inspect, and clean the wire mesh strainer. Replace if the mesh is torn or heavily oxidized. |
| Lever Pivot Pin Lubrication | Bi-Monthly | Maintenance Tech | 5 Mins | Apply a single drop of approved, non-attracting light machine oil to the lever pivot to prevent stiffness. |
| Automatic Shut-Off Test | Bi-Monthly | Site Supervisor | 10 Mins | Dispense fuel into a test container and manually submerge the spout tip; the nozzle must shut off instantly. |
| Diaphragm Pressure Test | Bi-Annually | Certified Technician | 30 Mins | Verify the "no pressure – no flow" device holds against line pressure without opening prematurely. |
| Complete Component Overhaul | Annually | Certified Technician | 45 Mins | Replace the spout assembly, main valve seal, and inlet strainer as part of routine lifecycle management. |
3. Step-by-Step Procedures for Key Tasks
Executing maintenance correctly is just as important as doing it on time. When dealing with fluid handling equipment connected to pressurized Fuel Dispensers, safety and precision are paramount.
Procedure 1: Inlet Strainer Inspection and Cleaning
The inlet strainer protects the highly sensitive internal main valve and Venturi mechanisms from scale, rust, and particulates originating from bulk tanks. A clogged strainer causes slow dispensing and strains the pumping system.
- De-energize the Pump: Isolate power to the fuel dispenser to ensure the pump cannot activate and pressurize the line during maintenance.
- Relieve Line Pressure: Squeeze the nozzle lever into an approved safety container to relieve any residual hydrostatic pressure in the hose.
- Isolate the Hose: If your system features isolation valves at the dispenser base, close them to prevent fuel siphoning.
- Disconnect the Nozzle: Using the correct sized non-sparking wrenches, carefully unthread the nozzle from the hose or swivel joint at the BSP 3/4" inlet.
- Extract the Strainer: Use a pick or needle-nose pliers to gently pull the wire mesh strainer from the inlet port. Do not crush the mesh.
- Clean the Strainer: Wash the strainer in clean, compatible solvent. Use a soft bristle brush to remove embedded particulates. Use compressed air (directed away from your face) to blow it dry.
- Inspect and Replace if Necessary: Hold the strainer up to the light. If the mesh is torn, collapsed, or permanently blinded by debris, discard it and install a new OEM strainer.
- Reassemble and Test: Reinstall the strainer, apply fresh hydrocarbon-rated thread sealant (if not using an O-ring swivel), reconnect the nozzle, restore power, and conduct a pressurized leak test.
Procedure 2: Auto Shut-Off Venturi Port Servicing
Nuisance tripping (the nozzle shutting off repeatedly before the tank is full) is the most common complaint from operators. This is almost always caused by a blocked vacuum sensing port or a failing Venturi tube.
- Secure the Equipment: Ensure the pump is off and the nozzle is safely secured on a workbench or stable surface.
- Locate the Sensing Port: Find the small hole situated near the very tip of the stainless steel spout.
- Clear External Debris: Wipe the spout tip thoroughly with a clean, lint-free cloth to remove external grease, dirt, or crystallized diesel exhaust fluid (if cross-contamination occurred).
- Clear the Port Hole: Carefully insert a soft, flexible wire (like a guitar string or a specialized cleaning reamer) into the sensing port. Do not use excessive force.
- Blow Out the Tube: Apply low-pressure compressed air (max 1.5 Bar) directly into the sensing port to push any internal blockages back through the Venturi tube.
- Check the Spout Check Valve: Some models feature a small check valve inside the spout. Gently shake the nozzle; you should hear a faint rattling sound indicating the poppet is moving freely.
- Inspect the Spout Attachment: Ensure the locking nut or set screw holding the stainless steel spout to the main nozzle body is perfectly tight. A loose spout will draw false air, destroying the vacuum and causing shut-off failure.
- Perform a Wet Submersion Test: Reconnect the nozzle, dispense fuel into a proving tank, and purposefully submerge the spout tip into the liquid. It must click off within a fraction of a second.
Common Mistake to Avoid
Never drill out or enlarge the vacuum sensing port on the spout tip.
Maintenance personnel dealing with repeated clogging sometimes attempt to widen the hole with a drill bit. This alters the fluid dynamics and destroys the Venturi vacuum ratio. The nozzle will permanently lose its automatic shut-off capability, leading to catastrophic overflow spills, environmental fines, and severe safety hazards. Always clean with soft wire or replace the spout assembly entirely.
4. On-Site Spare Parts to Stock
Relying on external suppliers for inexpensive consumable parts results in unacceptable downtime. Plant managers should integrate the following spares into their standard inventory, ensuring that a Fuel Flow Meter or dispenser assembly is never taken offline simply waiting for a minor nozzle component.
| Spare Part Component | Component Type | Recommended Stock Quantity | When to Replace |
| — | — | — | — |
| Stainless Steel Spout Assembly | Wear Part | 2 per every 10 nozzles | When bent, crushed, or if the internal Venturi tube is permanently blocked. |
| Duratuff Lever Guard | Protection Part | 3 per every 10 nozzles | When cracked, broken, or if the blocker plate is damaged. |
| Inlet Wire Mesh Strainers | Consumable | 5 per every 10 nozzles | Annually, or immediately if torn or permanently blinded by tank rust. |
| Hold-Open Clip Springs | Wear Part | 3 per every 10 nozzles | When the clip loses tension and fails to hold the lever open reliably. |
| BSP 3/4" Swivel O-Rings | Sealing Part | 10 per every 10 nozzles | Whenever the nozzle is removed from the hose for maintenance, preventing thread leaks. |
5. Diagnosing Maintenance-Related Failures
When a nozzle behaves erratically, the root cause is usually traced back to a neglected maintenance task. Use this diagnostic table to empower your technicians to troubleshoot quickly and effectively without needing external OEM support.
| Failure Symptom | Most Likely Missed Maintenance Task | Corrective Action Required |
| — | — | — |
| Constant Nuisance Shut-Offs | Failure to clean the vacuum sensing port on the spout. | Clean the port with a soft wire. If the spout is dented near the port, replace the spout assembly. |
| Nozzle Will Not Dispense Fuel | Failure to inspect/clean the inlet strainer, or system lacks pressure. | Clean the inlet strainer. Verify the "no pressure – no flow" mechanism is receiving at least minimum operating pressure from the pump. |
| Nozzle Fails to Shut Off (Overflows) | Ignoring a loose spout nut or a ruptured internal diaphragm. | Tighten the spout connection screw. If the issue persists, the internal vacuum diaphragm is ruptured; replace the nozzle. |
| Fuel Weeping from Lever Area | Failure to replace worn internal valve stem seals (packing). | The internal packing O-rings have failed due to high cycle wear. Rebuild the valve core or replace the nozzle. |
| Slow Flow Rate (< 30 L/min) | Ignoring filter maintenance schedule. | Remove and clean the inlet strainer. Verify the main dispenser filters are not also clogged. |
| Hold-Open Clip Slips Off | Neglecting visual inspections of the lever guard and spring. | Replace the hold-open clip spring and inspect the Duratuff guard for wear notches where the clip rests. |

6. Extending Service Life in Global Industrial Conditions
Standard operating procedures are designed for controlled environments. However, fuel nozzles used in extreme global industrial applications—such as Middle Eastern desert sites, tropical offshore platforms, or heavily particulate-laden mining operations—require aggressive strategies to combat environmental degradation.
- Combating Extreme Dust and Sand: In environments with high airborne particulate matter, dust easily enters the hold-open clip mechanism and the lever pivot, acting as an abrasive paste. Avoid using heavy grease on external parts, as this attracts sand. Instead, utilize dry PTFE-based lubricants on the lever pivot. Site managers should enforce a strict policy of utilizing nozzle boot covers on the dispensers to protect the spouts from sandstorms when not actively in use.
- Managing High Humidity and Offshore Corrosives: While the main spout is stainless steel and highly resistant to rust, the internal springs and valve stems can be vulnerable to saline atmospheres. Ensure the fuel being dispensed is free of water contamination, as internal water sitting against the main valve causes oxidation. Regularly cycle the nozzles even if they are acting as backups to keep the internal seals lubricated by the hydrocarbons.
- Mitigating Extreme Temperatures: In extreme cold, the rubber compounds in internal diaphragms and O-rings can become stiff, slightly delaying the automatic shut-off response time. Operators must be trained to expect a fractionally longer shut-off in sub-zero conditions. In extreme heat, fuel vapor pressure rises significantly; ensure your "no pressure – no flow" device is functioning correctly to prevent vapor lock and pressure weeping.
- Handling Fuel Contamination and Blends: The OPW 11b style is rated for diesel, fuel, and up to 10% ethanol blends. If your site processes highly contaminated fuel or unrefined bio-diesel, the internal strainers will clog rapidly. In these conditions, rely on robust bulk filtration upstream of the dispenser, and increase the nozzle strainer inspection frequency from monthly to weekly.
By marrying high-quality hardware with a rigid, outcome-driven maintenance schedule, facility managers can virtually eliminate the downtime and safety risks associated with fuel transfer operations.
FAQ
Q: Can I use this nozzle for aviation fuel or highly corrosive chemicals?
A: No. These automatic nozzles are designed explicitly for standard fuel, diesel, and up to 10% ethanol blends. Aviation fuels require specific certifications, and corrosive chemicals will destroy the internal rubber seals and diaphragm instantly.
Q: Why does the nozzle immediately shut off when I try to fill certain vehicles?
A: This is usually caused by the angle of the vehicle's filler neck causing fuel to splash back against the spout tip, prematurely covering the vacuum sensing port. Adjusting the angle of insertion or slightly reducing the flow rate using the Accu-stop lever will resolve this.
Q: How often do I actually need to replace the entire nozzle?
A: With proper preventive maintenance, the nozzle is cycle-verified to last longer than 1 million cycles. Typically, in heavy commercial use, complete replacement is recommended every 3 to 5 years, while wearing parts (spouts, strainers) are replaced as needed.
Q: Is it safe to remove the hold-open clip to prevent drivers from walking away?
A: Yes, many site managers permanently remove the hold-open clip spring for safety reasons, forcing the operator to manually hold the lever (manned dispensing). This does not damage the nozzle or affect the automatic shut-off safety feature.
Q: The nozzle feels heavier than usual and dispenses slowly, what is wrong?
A: If the nozzle feels unusually heavy, fuel may have bypassed the main valve stem seal and flooded the upper dome cavity above the diaphragm. This impedes the diaphragm's movement. The nozzle should be taken out of service and rebuilt or replaced.
Q: Do I need special tools to clean the internal inlet strainer?
A: No special tools are required. Standard non-sparking wrenches are needed to safely disconnect the nozzle from the hose, and a pair of needle-nose pliers can be used to gently extract the wire mesh strainer for cleaning.
Q: Will installing a swivel joint at the inlet affect the nozzle's performance?
A: Installing a compatible multi-plane swivel joint is highly recommended. It significantly reduces hose twisting, decreases operator fatigue, and minimizes stress on the nozzle's inlet threads, prolonging the overall life of the equipment.
Ready to upgrade your dispensing infrastructure or need replacement components to support your maintenance program? Contact the technical team at Achievers Pumps and Valves today. Please provide your required flow rates, specific fuel types, and site environmental conditions, and our experts will guide you to the perfect heavy-duty dispensing solution to maximize your operational uptime.